 |
|
|
French Polishing
By Mac Simmons
French polishing is one of the classic finishes for wood. Although French polishing came to the fore in the late 19th century, the underlying premise of using shellac has been used for nearly 4000 years. In this article we offer advice on one particular French polishing technique, although there are certainly many variations.
Shellac is sold as a ready to use coating in most paint and home improvement stores and is usually sold as either a clear (blond) or amber (orange) color. These ready to use variations come pre-mixed with Denatured Alcohol. It is also possible to purchase "pure" shellac flakes that you can mix yourself. The advantage of this latter approach is that it has a longer shelf life than the premixed variations as once the alcohol and flakes are mixed together the wax has life-span of about 12 months (depending on the temperature).
Where it comes from...Shellac resins come from the Coccus Lacca bug, indigenous to Thailand and India, and are actually the insect's resinous secretions. Ironically, for a finish that has such as dubious start in life, Shellac has many applications in today's world. The resin provides a non-toxic, thermoplastic coating that is approved by the food and drug industries as a coating on fruits (where the resin prevents molds and spores) and drugs (where it acts as a slow release enteric coating on many of today's medicines. The Shellac has excellent adhesive properties and can be polished to a high gloss or rubbed out to a satin or flat sheen as desired.
|
The "pure" Shellac flakes come in various types of flake and, as standard contains a natural wax. However, while the inclusion of this wax can make sanding easier, in some cases the shellac does not adhere to the wood surface too well. To address this issue, you can also buy a de-waxed version of some Shellacs.
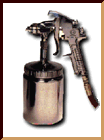
When mixing - or buying - shellac you should look for the number of "cuts." Each pound of Shellac flakes that is added to one gallon of Denatured Alcohol equates to one pound cut. So, for example, if you were to dissolve three pounds of flakes into one gallon of Denatured Alcohol, the result would be a three-pound cut. Normally Shellac is not used over a three pound cut, but some manufacturers sell "ready to use" four or five pound cuts. These should be reduced to a three pound cut (or less) before application. Note: if you are spraying the Shellac you should typically use a two pound cut, but do so at your own discretion having consulted the instructions proved with your spray equipment.
Applying the base coat
When first learning the art of French polishing, we recommend that you use a ready for use Shellac. You will also need to buy a bottle of Denatured Alcohol and a good paintbrush, as it will be necessary to brush on three thin coats of Shellac. Most ready to use Shellacs are three-pound cuts and you should reduce this down to two lots of 1 1/2 pound cut by doubling the amount of Denatured Alcohol.
To begin the process, use the brush to apply the Shellac to the wood ensuring that you apply a good even coat to the entire surface. This first thin coat (the "spit" coat) will dry very quickly under most conditions. [Note: If it does not dry within an hour then the Shellac is probably bad and should be replaced. In this situation, remove the sticky Shellac surface by applying more Denatured Alcohol.]
Once the first coat of Shellac is dry, apply a second coat. Then, once this is dry apply the third coat. Once you have added all three coats, leave the Shellac to dry overnight. The next day, use a 600 wet and dry sandpaper to smooth out the Shellac and then wipe off the sanding dust with a tack cloth. You now have your base coat for the French polishing.
Preparing the polishing pad
Mixing the French polish used within the pad comes down to an individual's choice. When first learning we recommend that you continue to use the 1 1/2-pound cut that we used to created the base coat above. However, as you become more proficient at this technique you may wish to experiment with lesser and greater cuts.
Take a soft, lint free cloth - such as cheesecloth - and fold it into a ball (called the "pad" or "rubber." Now apply the Shellac to the pad so that it is moist, but not dripping, with Shellac. Tap the pad in the palm of your hand in order to disperse the Shellac; the aim is to make sure that the entire front of the pad is damp. We recommend that you consider wearing surgical-type rubber gloves before beginning this process as it can be quite messy.
French Polishing
The best way to comprehend the act of French polishing is to imagine that the wood's surface (with the base coat on it) is an airport landing field and that the pad is a plane. What you are going to do is to practice allowing the plane (the pad) to touch down on the field and then immediately take off again, without stopping or even slowing down (if you were to stop you would damage the base coat). As you "land" slide the pad across the wood's surface and then take off again, working from left to right and then from right to left, overlapping each stroke as you apply it. Slowly work up from the bottom to the top and then start at the bottom again, ensuring that you have enough Shellac on the pad so that the strokes are uniform. You can add a little lemon oil or cream polish to the pad to help make it slide easier (although you should be very sparing with the oil).
Once you are satisfied with the wood's finish place the pad in a jar and close the lid tightly. Allow the Shellac to dry for at least a couple of hours and then take out the pad again. Add Denatured Alcohol to the pad and tap it in the palm of your hand to disperse the alcohol to the front of the pad. Then lightly pad over the wood's surface again. This process is known as "spiriting out" and serves to remove the oil as well as further evening out the Shellac finish. The result will be a far glossier, smoother finish.