 |
|
|
Quilt Hanger

A quilt hanger is a very simple project. At its most basic, the hanger is essentially two pieces of thin wood that are screwed together, clamping the top of the quilt in between them. The only tricky parts are coming up with a design that successfully hides both the screws that clamp the two pieces of wood together as well as the screws used to attach the hanger to the wall.
Construction
Tools required: drill, sander, router, plane or circular saw
Wood required: (cherry)
Note that the length of the quilt hanger depends upon the width of the quilt in question. In the below example, the quilt is 67" wide.
| Description | Qty | Width | Thickness | Length |
| Top wood | 1 | 2" | 3/4" | 67" |
| Underlying wood | 1 | 2" | 1/2" | 67" |

First take the top wood and miter the two front facing edges to a 45 degree angle (see diagram). The reason for doing this is purely decorative: we didn't want to make a hanger that appeared to be too "blocky" and mitering the edges like this makes it look less intrusive.
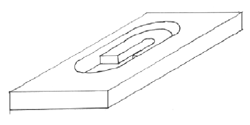
Next, on the underside of the top wood, rout out a groove that is 3/8" wide, 1/8" deep and begins 1/4" from the lower edge of the hanger (again, refer to diagram). This groove should run the entire length of the hanger. The purpose of this groove is to allow for the additional thickness that most quilts have around the edge. This thicker edge sits in the groove allowing the wood to clamp together at the lowest point of the wood.
The top wood should now be sanded to round out the miter, thus making it a smoother surface.
The underlying wood is in some ways even simpler to build as it requires no miters. This piece has the hanging slots and the screw holes for clamping the two pieces of wood together. First, make five small holes 7/8" from the top side of the wood, evenly spaced with the outer two holes being 1" from each end. Nominate one side of the wood to be the side that will make contact with the wall and countersink the drill holes on this side. These holes will accommodate the small screws that are used to clamp the two pieces of wood together. Note that because they are drilled at a distance of 7/8" from the top of the wood, the screws will not damage the quilt, but will attach just above the routed groove made in the top wood earlier.

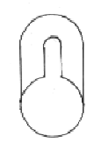
To hang the quilt on the wall, we need to devise a method of hooking the hanger onto screws that are drilled into the wall. To do this, we need to make three "keyholes." First, drill a hole that is 3/8" diameter, 3" from one end of the hanger and 1" from the top. Then, 1/4" above this hole, drill a smaller hole that is 1/8" diameter (just larger than the diameter of the screw that will attach the hanger to the wall). Then, on the side that is not going to make contact with the wall, drill out this smaller hole to a diameter of 3/8" and to a depth of 1/4".

Finally, with a knife or keyhole saw, connect the two holes together to form the desired shape. The underlying premise of this construction is that the screw will be pushed into the space made by the larger hole. Then the quilt hanger will be dropped down a little so that the screw is firmly slotted into the small hole.
Repeat this keyhole at the other end of the hanger, and one in the center.
Finally, sand the quilt hanger and wax.
