 |
|
|
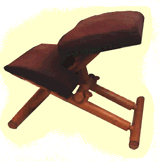
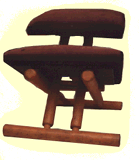
Ergonomic stool

Ergonomic stools provide the combined benefit of being both good for your back and being a convenient spare due to the fact that you can fold them up when they are not in use. The stool is surprisingly easy to construct: there are no complicated joints to make and no special tools required. This stool is made out of 1 1/2" thick dowel, which can be difficult to find. However, if you cannot find this thickness you can get away with 1 1/4" wood.
Construction
Tools required: Drill, sander
Wood required: (beech)
| Description | Qty | Thickness | Width | Length |
| Base support | 2 | 1 1/2" (38 mm) | 1 1/2" (38 mm) | 16" (406 mm) |
| Back legs | 2 | 1 1/2" (38 mm) | 1 1/2" (38 mm) | 21 3/4" (552 mm) |
| Front legs | 2 | 1 1/2" (38 mm) | 1 1/2" (38 mm) | 19 1/2" (495 mm) |
| Cross support beam | 1 | 1 1/2" (38 mm) | 1 1/2" (38 mm) | 6" (152 mm) |
| Vertical support beam | 1 | 1 1/2" (38 mm) | 1 1/2" (38 mm) | 5" (127 mm) |
| Joining dowels | 4 | 7/8" (22 mm) | 7/8" (22 mm) | 1 3/4" (44 mm) |
| Seat rest dowels | 4 | 7/8" (22 mm) | 7/8" (22 mm) | 3/4" (19 mm) |
| Top seat (plywood) | 1 | 1/4" (6 mm) | 6 1/2" (165 mm) | 14" (356 mm) |
| Knee seat (plywood) | 1 | 1/4" (6 mm) | 9" (229 mm) | 13 1/2" (346 mm) |
| Stopper body | 4 | 1" (25 mm) | 1" (25 mm) | 1 1/2" (38 mm) |
| Stopper end | 4 | 1 1/2" (38 mm) | 1 1/2" (28 mm) | 3/8" (10 mm) |
First we need to construct the four stoppers. To make these, take four pieces of dowel 1" diameter and 1 1/2" long. On one end of each of these glue a narrow sliver of dowel that is 1 1/2" diameter and 3/8" long. The result is a small mushroom-shaped stopper.
Take one of the two base support pieces and drill a 7/8" diameter hole that is 1/2" deep and 6 1/4" from either end (and therefore, and more importantly, 3 3/4" apart). Glue a joining dowel into each of the holes. This is the front base support.
Next take the second base support (this is now the rear base support). Drill two holes (again 7/8" wide and 1/2" deep) that are 4 1/2" from either end, and therefore 7" apart. Glue two dowels into the holes.
Take one the two rear legs and drill a 7/8" diameter hole that is 1/2" deep in one end. This hole will slot into one of the rear support dowels later and, as such, is the bottom end of the rear leg. Drill a hole 1/4" diameter all the way through the leg at a distance of 14 5/8" from the bottom end. This hole is to accommodate the longer metal rod that is used to connect the front and back legs together.
Consider the hole that is drilled all of the way through the leg to go from one side to another and, based on this, nominate a top (at 90 degrees to the side). Drill two holes 7/8" diameter and 1/2" deep that are 12 1/4" and 20" from the bottom of the leg into this top side. Glue the seat supports into these two holes. Then drill a further hole that is 8 3/4" from the bottom of the leg (again, in the top). This hole should be 7/8" diameter and 1/2" deep. Glue the seat stopper into this hole.
Repeat the above steps for the second rear leg.

Take one of the front legs and drill a 7/8" diameter hole that is 1/2" deep in the center of one end. This is the bottom end of the front leg. Then drill a hole that is 1/4" diameter, all the way through the leg at distances of 6 1/2" and 12 1/2" from the bottom. The lower of these holes will accommodate the longer metal rod that joins the front and rear legs. The higher hole is for the smaller metal bar that interconnects the two front legs to the vertical support. To finish off the front legs, cut the top of the front legs at an angle of 45 degrees.
Repeat the above steps for the second front leg.
Now it is time to begin the stool's assembly. Glue the two front legs into the front base support dowels. Glue and screw the plywood seat to the angled, top, end of these legs.
Next, take the two rear legs and glue them into the rear base support. Position the two rear legs either side of the front legs and then glue and screw the knee rest into the four seat supports. [Note that the knee support should be cut into a U shape to allow the front supports to pass thorugh the middle of the U while gaining the maximum knee supoprt space on either side. To do this, cut out an area that is 4" in from the back and 7" wide]] The result is that the front and rear legs, while not yet connected together, are intertwined.
To join the front and rear legs, pass the longer metal bar through the correct holes in both the front and rear legs, thus connecting them together.
Now, join the vertical support to the cross beam support by use of one of the joining dowels, as explained previously. In each end of the cross beam, drill a 7/8" diameter hole that is 1/2" deep. Add into this one of the four stoppers. Repeat this for the other end.
Then, drill a hole for the metal bar at a height of 1 1/4" from the top of the vertical support. Then, connect this support to the two front legs by sliding the smaller metal bar through the two legs, via the vertical support.
Now, sand the entire stool and then finish with wax. Finally, add foam padding to the knee and top seat and cover it.