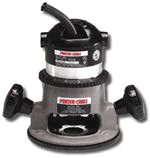
Plunge $130 upwards
Fixed $130 upwards
There are two distinct types of router; the plunge router and the fixed (or standard) router. Both types can offer the same end results, although each type is better for particular jobs.
The plunge router is especially useful when the routed area begins in the middle of the wood, rather than at the edge. The maximum plunge depth can be set so that you slowly lower the router bit into the wood while keeping the router flat on the wood's surface. While a fixed router can also be used in this example, the router cut depth is fixed and you must hold the router at an angle as you slowly allow the router bit to cut into the wood. This is not as accurate for small routs.
The fixed router is far better for routs along the edge of a piece of wood. The fixed router is also better for any time when the depth of the cut must be very accurate. Fixed routers allow very small increases in the depth of cut and are far more accurate than plunge routers. Further, if you are considering attaching your router to a router table, a plunge router is not suitable.
If you only have the budget for one router, we recommend that you start with a fixed router. However, it is often possible to buy a combination router. This is a router that comes with two bases: a plunge base and a fixed base and these combos are certainly worth looking into.
When looking for a router, consider the following options:
Routers are typically used to cut grooves, hollow out larger areas and create decorative trims along the edge of a piece of wood. The shapes that can be cut by your router are limited only by the number of router bits that you own.
The golden rule with routing is to cut a little at a time. It is often tempting to rout a deep groove in one go but this firstly risks ripping the wood and secondly wears out the router bits quicker. A little patience will go a long way.

Router bits can be categorized in two camps: edge bits and non edge bits. Edge router bits have small nylon (or metal) wheels on the bottom of them (see picture) that run along the wood. This allows you to rout along the edge of the wood without using a fence. Non-edge bits do not have this wheel, and are therefore more commonly used when routing a groove down the middle of a piece of wood. However, they can also be used along the edge of the wood as long as you use a rip fence or a router table.
Router bits are made out of either High Speed Steel (HSS) or are Carbide Tipped. Carbide Tipped are far better, although they are significantly more expensive. However, as Carbide Tipped bits last up to 20 times longer, they do work out to be cheaper in the longer term.
To rout a straight groove, either use a rip fence, a router table or clamp a straight rule across the wood so that the router can guided along it. It is important to note that there is a right and wrong way to run your router along the edge of a piece of wood. Typically routers rotate in a clockwise direction (when viewing the router from the top). It is therefore best to move the router from the left towards the right (when facing the wood). Routing in the wrong direction will cause the router bit to dig into the wood and may cause splintering of the wood. To ensure that your router abides by the left to right rule, consult your router manual.
Always wear ear defenders and eye protectors when using a router.